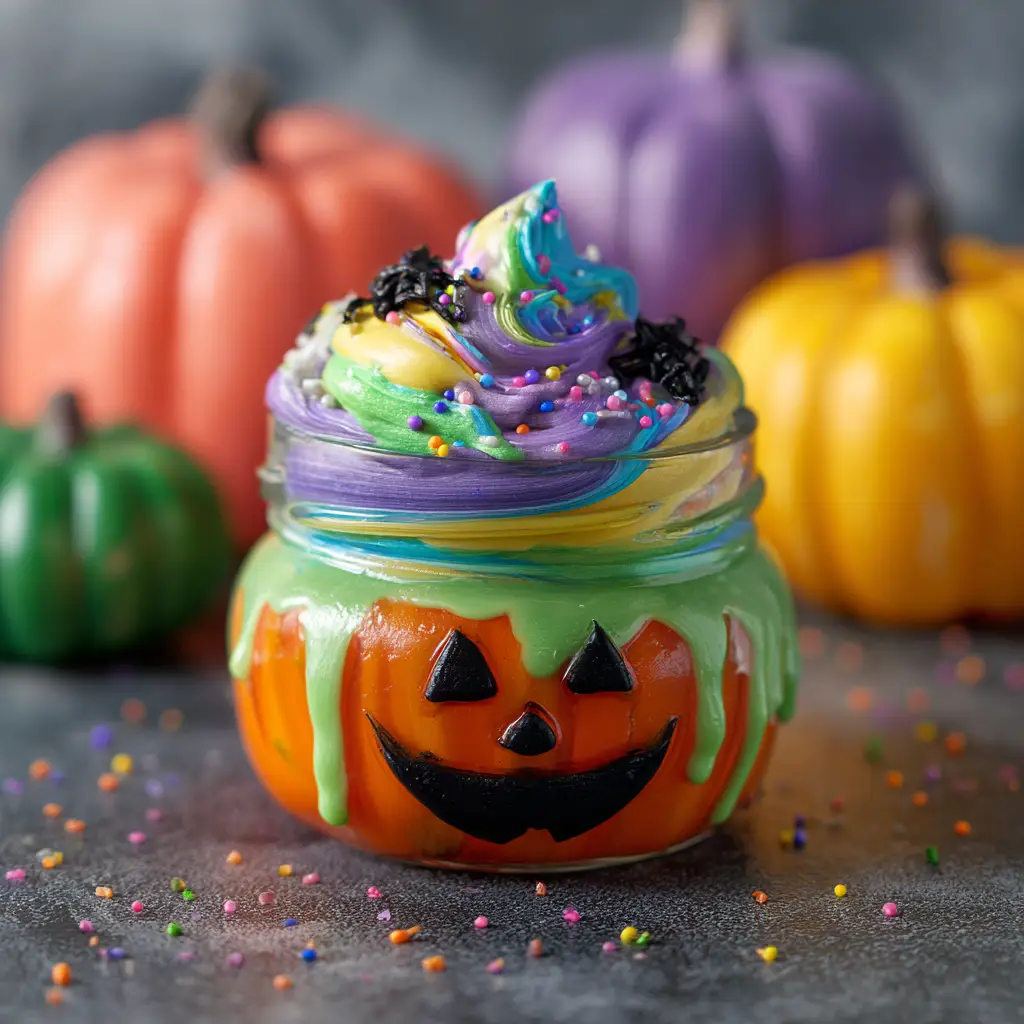
Halloween is the perfect time to mix fun, creativity, and a little bit of mess. A Halloween slime recipe offers kids and adults alike a playful activity that sparks imagination. It is not just a craft; it’s an engaging sensory experience that delights with texture, color, and stretchiness.
Creating Halloween slime allows families to bond in a hands-on way. You can choose colors like neon green, orange, and black to match the spooky theme. Adding glitter, foam beads, or tiny plastic spiders turns the slime into an exciting Halloween centerpiece.
This slime recipe is easy to follow and safe, using simple household ingredients. Whether for a Halloween party, classroom activity, or home craft, this slime brings joy, creativity, and a little bit of Halloween magic to everyone involved.
Ingredients Needed

Here is a proper column layout for the ingredients needed to make Halloween slime:
| Ingredient | Quantity | Notes/Optional Add-ins |
|---|---|---|
| White school glue | 1 cup | Clear glue can be used instead |
| Baking soda | 1 tsp | Helps the slime firm up |
| Contact lens solution | 2 tbsp | Acts as the activator |
| Water | ½ cup | For a smoother texture |
| Food coloring | 3-4 drops | Orange, green, black, or purple |
| Glitter | 1 tsp | Optional for sparkle |
| Foam beads | 2 tbsp | Optional for texture |
| Plastic spiders | A few | Optional Halloween decoration |
Step-by-Step Cooking Instructions
- Combine Glue and Water
Pour 1 cup of glue into a mixing bowl and add ½ cup of water. Stir thoroughly until blended. - Add Food Coloring
Mix in 3-4 drops of your chosen food coloring until the color is evenly distributed. - Add Baking Soda
Stir in 1 teaspoon of baking soda. This helps thicken the slime. - Add Contact Lens Solution
Slowly add 2 tablespoons of contact lens solution while stirring. The slime will start to form immediately. - Knead the Slime
Once the mixture begins pulling away from the sides of the bowl, knead it with your hands for 2-3 minutes until smooth and stretchy. - Add Optional Ingredients
Gently fold in glitter, foam beads, or small plastic spiders for a festive Halloween touch. - Let It Rest
Allow the slime to rest for 5-10 minutes to fully firm up before playing or displaying.
Tips for Customizing the Recipe
- Use glow-in-the-dark paint to make your slime spooky at night.
- Divide the batch and use multiple colors to create a layered slime effect.
- For a thicker slime, add a tiny bit more contact lens solution during kneading.
- Store slime in an airtight container to maintain its texture for several days.
- Add scented oils like pumpkin spice or vanilla for a themed sensory experience.
Nutritional Information
Although Halloween slime is not edible, here’s a safety column for reference and optional non-toxic ingredients:
| Ingredient | Safety Notes | Non-toxic Option |
|---|---|---|
| White school glue | Non-toxic, safe for craft | Clear school glue |
| Baking soda | Generally safe, avoid ingestion | N/A |
| Contact lens solution | Not edible | N/A |
| Food coloring | Non-toxic, avoid eating large amounts | Natural food coloring |
| Glitter | Non-toxic, avoid ingestion | Biodegradable glitter |
| Foam beads | Not edible | Edible sprinkles alternative |
Serving Suggestions

Halloween slime is perfect for:
- Halloween party activity tables
- Classroom sensory projects
- Spooky decorations that kids can handle
- Fun take-home gifts for friends and family
Conclusion
Halloween slime is a fun, creative activity that adds excitement to any spooky celebration. Its stretchy, gooey texture combined with vibrant colors and optional decorations makes it a hit for kids and adults alike.
Following this simple recipe, anyone can create slime safely while exploring their artistic side. Whether for parties, crafts, or just a playful afternoon, this Halloween slime recipe is a must-try for a memorable holiday experience.