Most hummus disappoints for one reason: texture. It’s either gritty, too thick, or tastes like raw garlic punched you in the face. This recipe fixes all three problems with a single trick professional kitchens have used for years.
The secret is ice water, whipped into tahini before the chickpeas ever enter the bowl. This one step aerates the tahini, turning it pale, light, and almost mousse-like. From there, everything else falls into place.
You don’t need fancy equipment or imported ingredients. A food processor, canned or home-cooked chickpeas, and a few pantry staples get you there in under fifteen minutes. What you get in return is a hummus that’s smoother, lighter, and more flavorful than anything sold in a plastic tub.
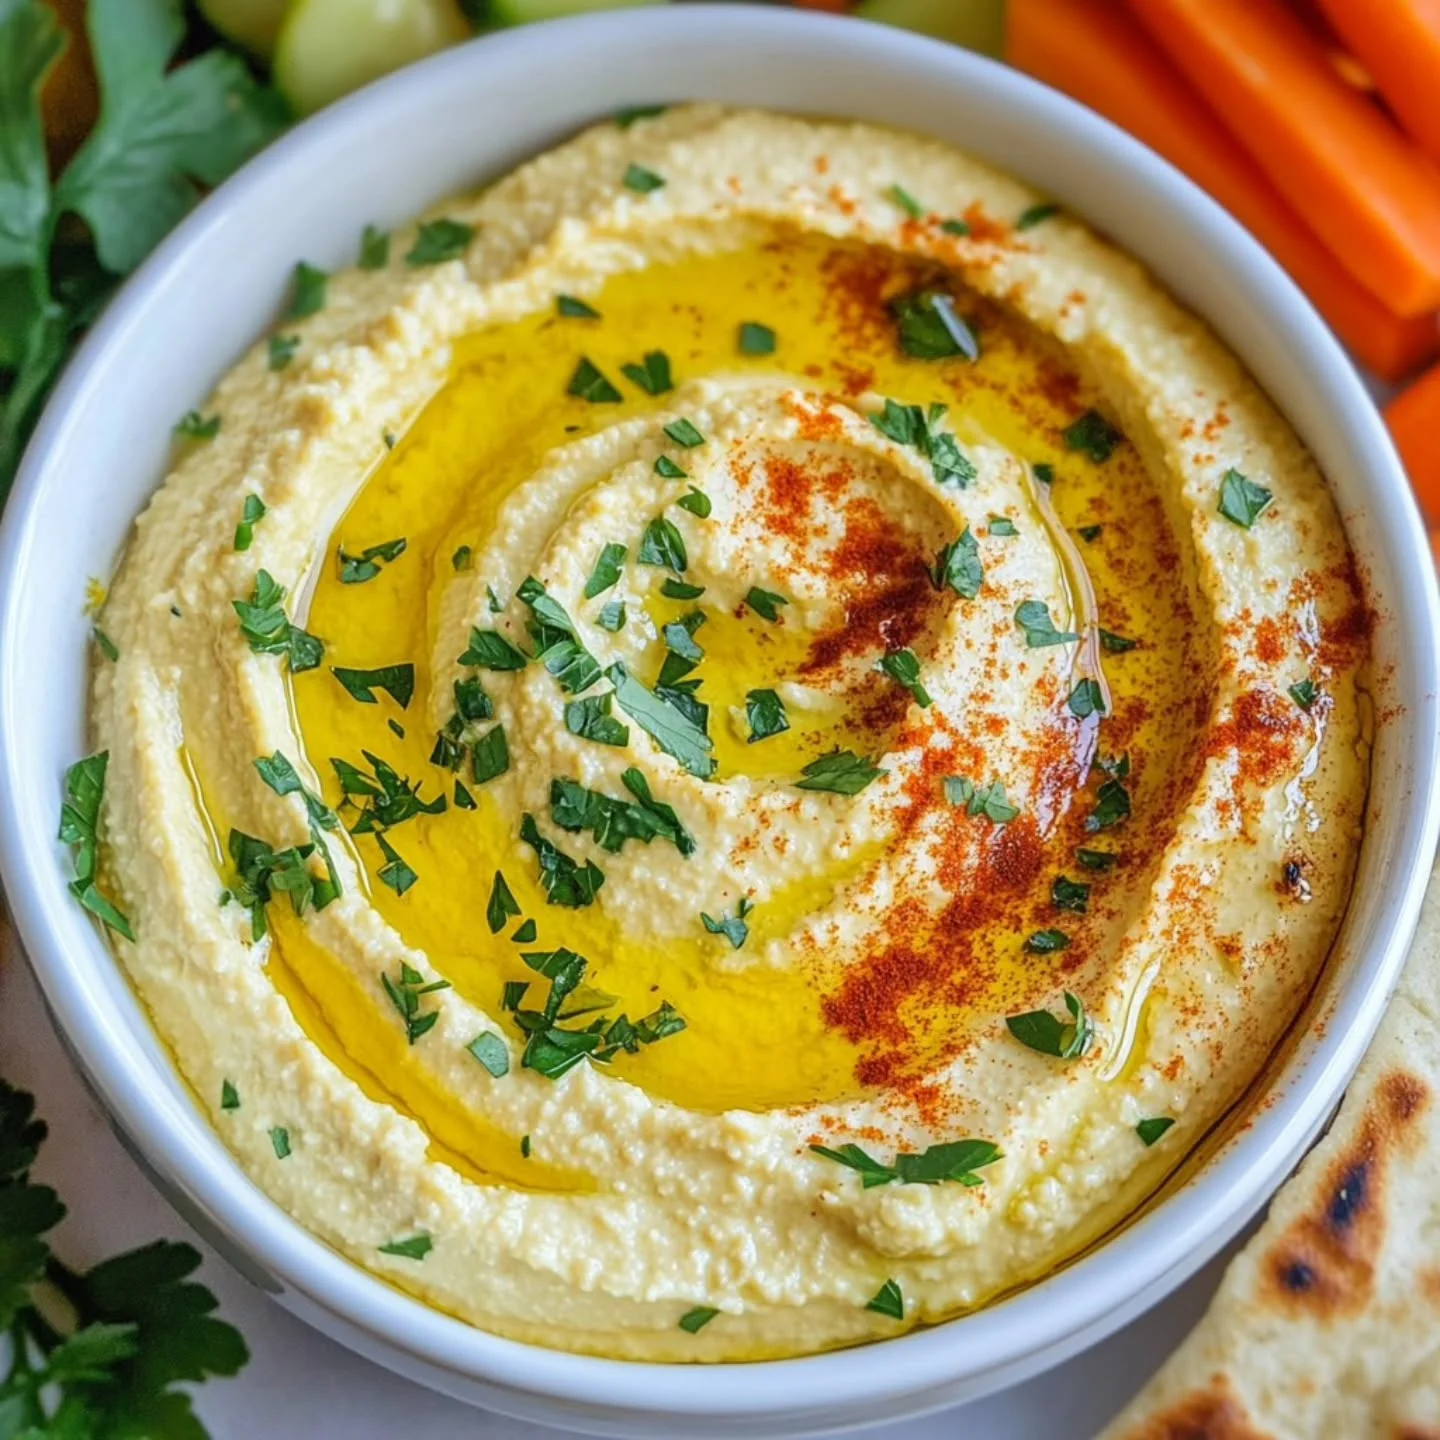
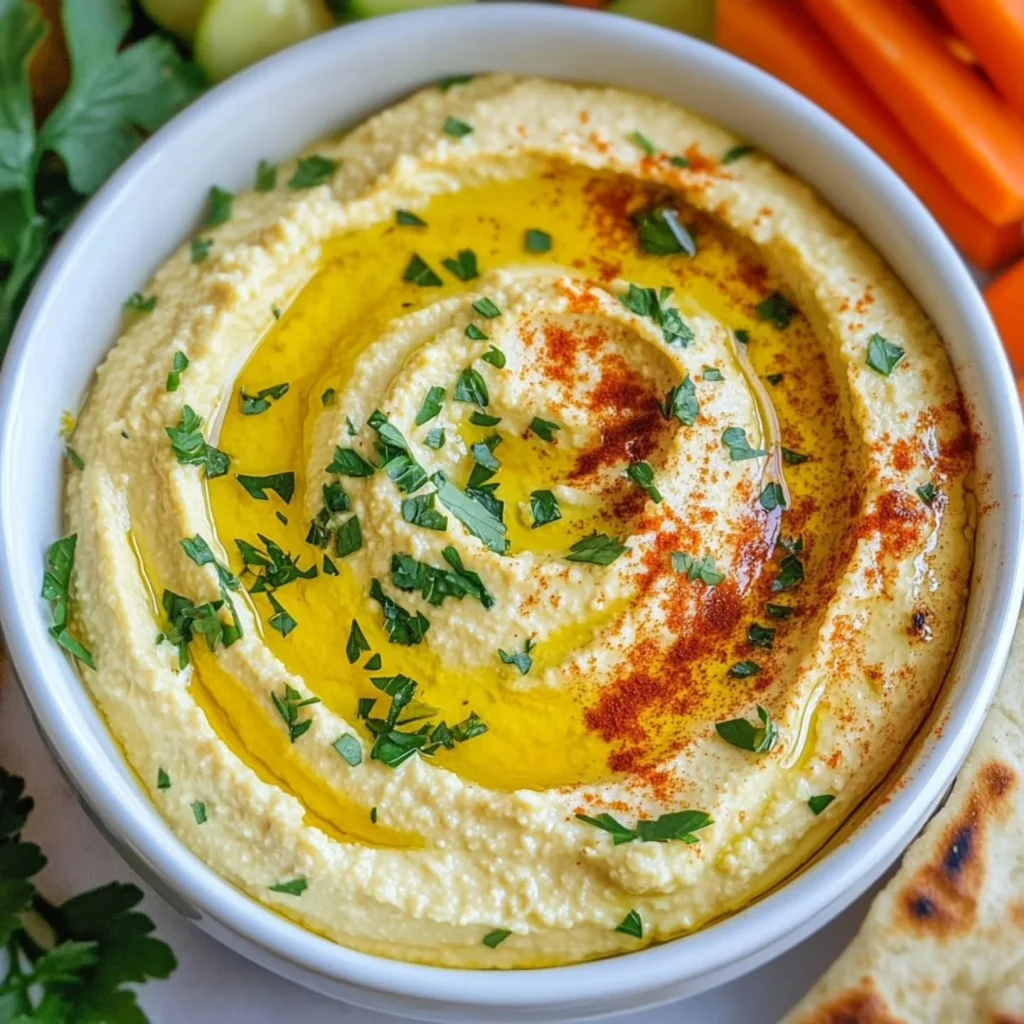
This isn’t just another dip. Finished with good olive oil, a dusting of paprika, and toppings like crisped chickpeas or charred lemon, it becomes a centerpiece. Serve it on a hummus board, spoon it into bowls, or spread it thick on warm pita. Once you taste homemade hummus done right, store-bought versions won’t tempt you again.
Ingredients You’ll Need
Great hummus isn’t about a long ingredient list — it’s about ratios and technique, and once you see how few things go into that famously silky texture, you’ll wonder why you ever bought it pre-made. One of the things I love about this recipe is that it uses simple pantry ingredients. You probably already have most of them in your kitchen.
Base Ingredients
- 2 cups cooked chickpeas (or 2 cans, drained and rinsed)
- 1/2 cup tahini, well stirred
- 1/4 cup fresh lemon juice
- 3 tablespoons ice water, plus more as needed
- 2 cloves garlic, minced
- 3 tablespoons extra virgin olive oil, plus more for serving
- 1/2 teaspoon ground cumin
- 3/4 teaspoon fine sea salt, or to taste
- 1/4 teaspoon baking soda (if using dried chickpeas)
Optional Add-ins
- 1/4 teaspoon smoked paprika, for garnish
- 2 tablespoons crisped chickpeas, for topping
- 1 tablespoon chopped fresh parsley
- 1/2 lemon, charred and sliced
- 1 tablespoon pine nuts, toasted
- 1/4 teaspoon za’atar seasoning
Step-by-Step Instructions
Whip the Tahini
Add tahini and lemon juice to a food processor. Blend for about a minute until the mixture seizes up, then loosens into a pale, creamy paste. This step matters more than people realize — it’s what gives hummus its light, whipped texture instead of a dense, pasty consistency. Scrape down the sides once or twice. The color should shift from beige to almost white before you move forward with the rest of the recipe.
Build the Base Flavor
With the processor running, drizzle in the minced garlic, cumin, and salt. Let it combine fully into the tahini mixture for about 20 seconds. Adding garlic at this stage, rather than blending it whole with the chickpeas, mellows its sharpness and distributes the flavor evenly. If you prefer a milder garlic taste, reduce to one clove or briefly microwave the cloves for ten seconds before mincing.
Add the Chickpeas
Add half the chickpeas and blend for one minute. Scrape the bowl, then add the remaining chickpeas along with the ice water. Process for two to three minutes, stopping to scrape as needed, until completely smooth. This longer blend time is non-negotiable — rushing it is the single biggest reason homemade hummus turns out grainy instead of silky.
Adjust and Finish
Taste and adjust salt, lemon, or water until the texture and flavor feel right. Hummus should be thick enough to hold a swoop but loose enough to fall slowly off a spoon. Transfer to a serving bowl, swirl the surface with the back of a spoon, and drizzle generously with olive oil. Finish with paprika and any toppings you like before serving immediately or chilling.
Cook Time
Total: 15 minutes
Prep: 15 minutes
Bake: Not applicable
Servings
This recipe makes approximately 2.5 cups of hummus, enough to comfortably serve six people as an appetizer or four as part of a light lunch alongside pita and vegetables. It scales easily, so doubling the batch for a party or gathering works without any adjustment to technique.
Portion size really depends on how it’s served. As a dip on a shared board with crackers, olives, and vegetables, a little goes a long way. As a main component of a mezze plate or wrap filling, expect people to use closer to half a cup each.
Leftover hummus stores well, which makes a larger batch worthwhile even for smaller households. It holds its texture and flavor for days, so there’s rarely waste, and it repurposes easily into sandwiches, grain bowls, or a quick snack with crackers.
Common Mistakes in This Recipe
The most frequent mistake is skipping the tahini-and-lemon step and dumping everything into the processor at once. This shortcut seems harmless but it’s the main reason hummus turns out dense or slightly gritty rather than light and creamy. Tahini needs time alone with an acid to loosen properly before other ingredients are introduced.
Another common issue is under-blending. Home cooks often stop processing the moment the mixture looks smooth on top, without scraping the sides or checking underneath. Chickpea skins and unblended bits settle at the bottom and edges, creating a grainy mouthfeel that’s easy to avoid with a little patience.
Using cold tap water instead of ice water is a subtler mistake, but it noticeably changes the final texture, making the hummus heavier rather than airy.
Finally, many recipes go too heavy on raw garlic, which can overpower the dish and mask the nuttiness of the tahini and chickpeas entirely.
Solutions to Common Mistakes
Always blend tahini with lemon juice first, on its own, until it turns pale and thick. This two-minute step sets up the entire texture of the finished hummus and should never be skipped, regardless of how rushed the process feels.
To avoid grainy texture, scrape down the bowl at least twice during blending and process longer than feels necessary. A full three minutes of total blend time is standard in professional kitchens for a reason — it fully breaks down chickpea fibers.
Swap tap water for ice water specifically. The cold temperature helps emulsify the tahini and oil, creating that signature light, whipped consistency people associate with restaurant-quality hummus.
Taste garlic in small increments, adding half a clove at a time until the balance feels right rather than dumping it all in upfront.
Nutritional Information (approx. per serving)
- Calories: 160
- Protein: 5g
- Carbohydrates: 12g
- Fat: 11g
- Fiber: 4g
- Sodium: 210mg
- Sugar: 1g
Chickpeas bring a meaningful dose of plant-based protein and fiber to this recipe, which supports steady digestion and helps meals feel more satisfying without extra effort. This makes hummus a smart addition for anyone building more balanced, plant-forward meals throughout the week.
Tahini contributes healthy unsaturated fats along with calcium and iron, nutrients that are sometimes harder to get enough of on a plant-based diet. It also adds a subtle richness that keeps the recipe satisfying in small portions.
Olive oil rounds out the fat profile with heart-healthy monounsaturated fats, long associated with better cardiovascular outcomes when used in place of more processed oils.
Because this recipe skips preservatives, stabilizers, and excess sodium found in most store-bought tubs, it’s an easy way to enjoy a familiar comfort food with a cleaner ingredient list and more control over flavor.
Storage Instructions
Store hummus in an airtight container in the refrigerator, where it will stay fresh for up to five days. Press a thin layer of olive oil over the surface before sealing — this helps prevent the top from drying out or forming a skin overnight.
If the hummus thickens in the fridge, that’s completely normal and easy to fix. Simply stir in a teaspoon of water or lemon juice at a time until it loosens back to its original texture.
Freezing is also an option for longer storage. Portion hummus into small airtight containers, leaving a little room for expansion, and freeze for up to three months. Thaw overnight in the refrigerator before use.
Avoid leaving hummus at room temperature for more than two hours, especially in warm weather, since dairy-free dips like this one can still spoil if left out too long during gatherings or picnics.
Suggestions
Serve this hummus as the anchor of a full mezze spread alongside warm pita, crunchy vegetables, olives, and pickled peppers for an effortless appetizer that feeds a crowd. It also works beautifully spread thick inside wraps and sandwiches in place of mayonnaise or heavier spreads.
For a heartier presentation, spoon it into a shallow bowl, create a well in the center, and fill it with warmed spiced ground meat or roasted vegetables for a more substantial main course.
Pair it with something acidic on the side, like a simple cucumber and tomato salad dressed in lemon, to balance the richness of the tahini and olive oil.
If serving at a party, set out a small topping bar — crisped chickpeas, herbs, chili oil — so guests can customize their own bowl.
Seasonal Relevance
Hummus works year-round, but it shines particularly in warmer months when lighter, no-cook appetizers are in higher demand. During spring and summer gatherings, it pairs naturally with fresh vegetables, grilled bread, and chilled white wine or sparkling water.
In cooler months, it still holds its place on the table, especially alongside roasted vegetables, warm flatbread, or as part of a holiday appetizer spread where guests want something make-ahead and low-maintenance.
Because chickpeas and tahini are shelf-stable pantry staples, this recipe isn’t tied to any particular growing season, which makes it a reliable option regardless of what’s fresh at the market.
It’s also a natural fit for entertaining during any holiday season, since it can be made a day in advance and only improves in flavor as it sits.
Final Words
Good hummus comes down to patience and a few small technique choices, not a long ingredient list or specialty equipment. Whipping the tahini properly and giving the mixture enough time in the food processor makes the difference between average and exceptional.
Once you’ve made it this way, it’s genuinely hard to go back to store-bought tubs, which rarely match this texture or freshness. The cost difference is significant too, especially if hummus is a regular part of your meals or entertaining routine.
Feel free to treat the base recipe as a template. Once the texture is right, flavor additions like roasted red pepper, herbs, or extra spice are easy to build on top of it.
Make a batch this week and taste the difference for yourself — homemade hummus, done properly, earns its place as a kitchen staple rather than an occasional treat.
Frequently Asked Questions
Can I make this hummus without a food processor?
Yes, though the texture won’t be as smooth. A high-powered blender works as a substitute, or you can mash chickpeas by hand for a rustic, chunkier version. Expect a noticeably different consistency compared to the processor method.
Why is my hummus bitter?
Bitterness usually comes from raw garlic or old, rancid tahini. Use fresh tahini, taste it before adding, and reduce raw garlic if it tastes sharp. Roasting the garlic beforehand also softens bitterness significantly.
Can I use dried chickpeas instead of canned?
Absolutely. Soak dried chickpeas overnight, then simmer with a pinch of baking soda until very soft. This actually produces a creamier hummus than canned chickpeas, since the skins break down more easily during blending.
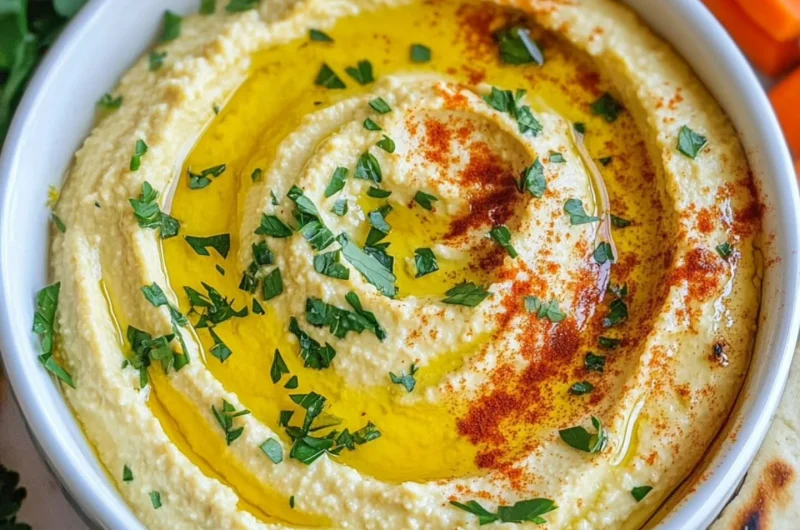
Creamy Homemade Hummus That’s Better Than Store-Bought
6
servings15
minutes160
kcalSilky, restaurant-quality hummus made creamy with a simple ice-water trick. Whipped tahini, fresh lemon, and garlic come together in minutes for a smooth, mousse-like dip that easily beats anything store-bought.
Ingredients
2 cups cooked chickpeas (or 2 cans, drained and rinsed)
1/2 cup tahini, well stirred
1/4 cup fresh lemon juice
3 tablespoons ice water, plus more as needed
2 cloves garlic, minced
3 tablespoons extra virgin olive oil, plus more for serving
1/2 teaspoon ground cumin
3/4 teaspoon fine sea salt, or to taste
1/4 teaspoon baking soda (if using dried chickpeas)
1/4 teaspoon smoked paprika, for garnish
2 tablespoons crisped chickpeas, for topping
1 tablespoon chopped fresh parsley
1/2 lemon, charred and sliced
1 tablespoon pine nuts, toasted
1/4 teaspoon za’atar seasoning
Directions
- Add tahini and lemon juice to a food processor; blend for about 1 minute until pale and thickened.
- With the processor running, add minced garlic, cumin, and salt; blend for 20 seconds.
- Add half the chickpeas; blend for 1 minute, then scrape down the bowl.
- Add remaining chickpeas and ice water; process for 2–3 minutes until completely smooth.
- Taste and adjust salt, lemon, or water until texture and flavor are balanced.
- Transfer to a serving bowl, swirl the surface, and drizzle with olive oil.
- Garnish with paprika and desired toppings; serve immediately or chill before serving.
Recipe Video
Notes
- Use ice-cold water, not tap water, for the lightest, creamiest texture.
- Don’t rush the blending step — a full 2–3 minutes prevents graininess.
- Store in an airtight container with a thin layer of olive oil on top for up to 5 days.
- Freezes well for up to 3 months in a sealed container.
- Add roasted garlic instead of raw for a milder, sweeter flavor.