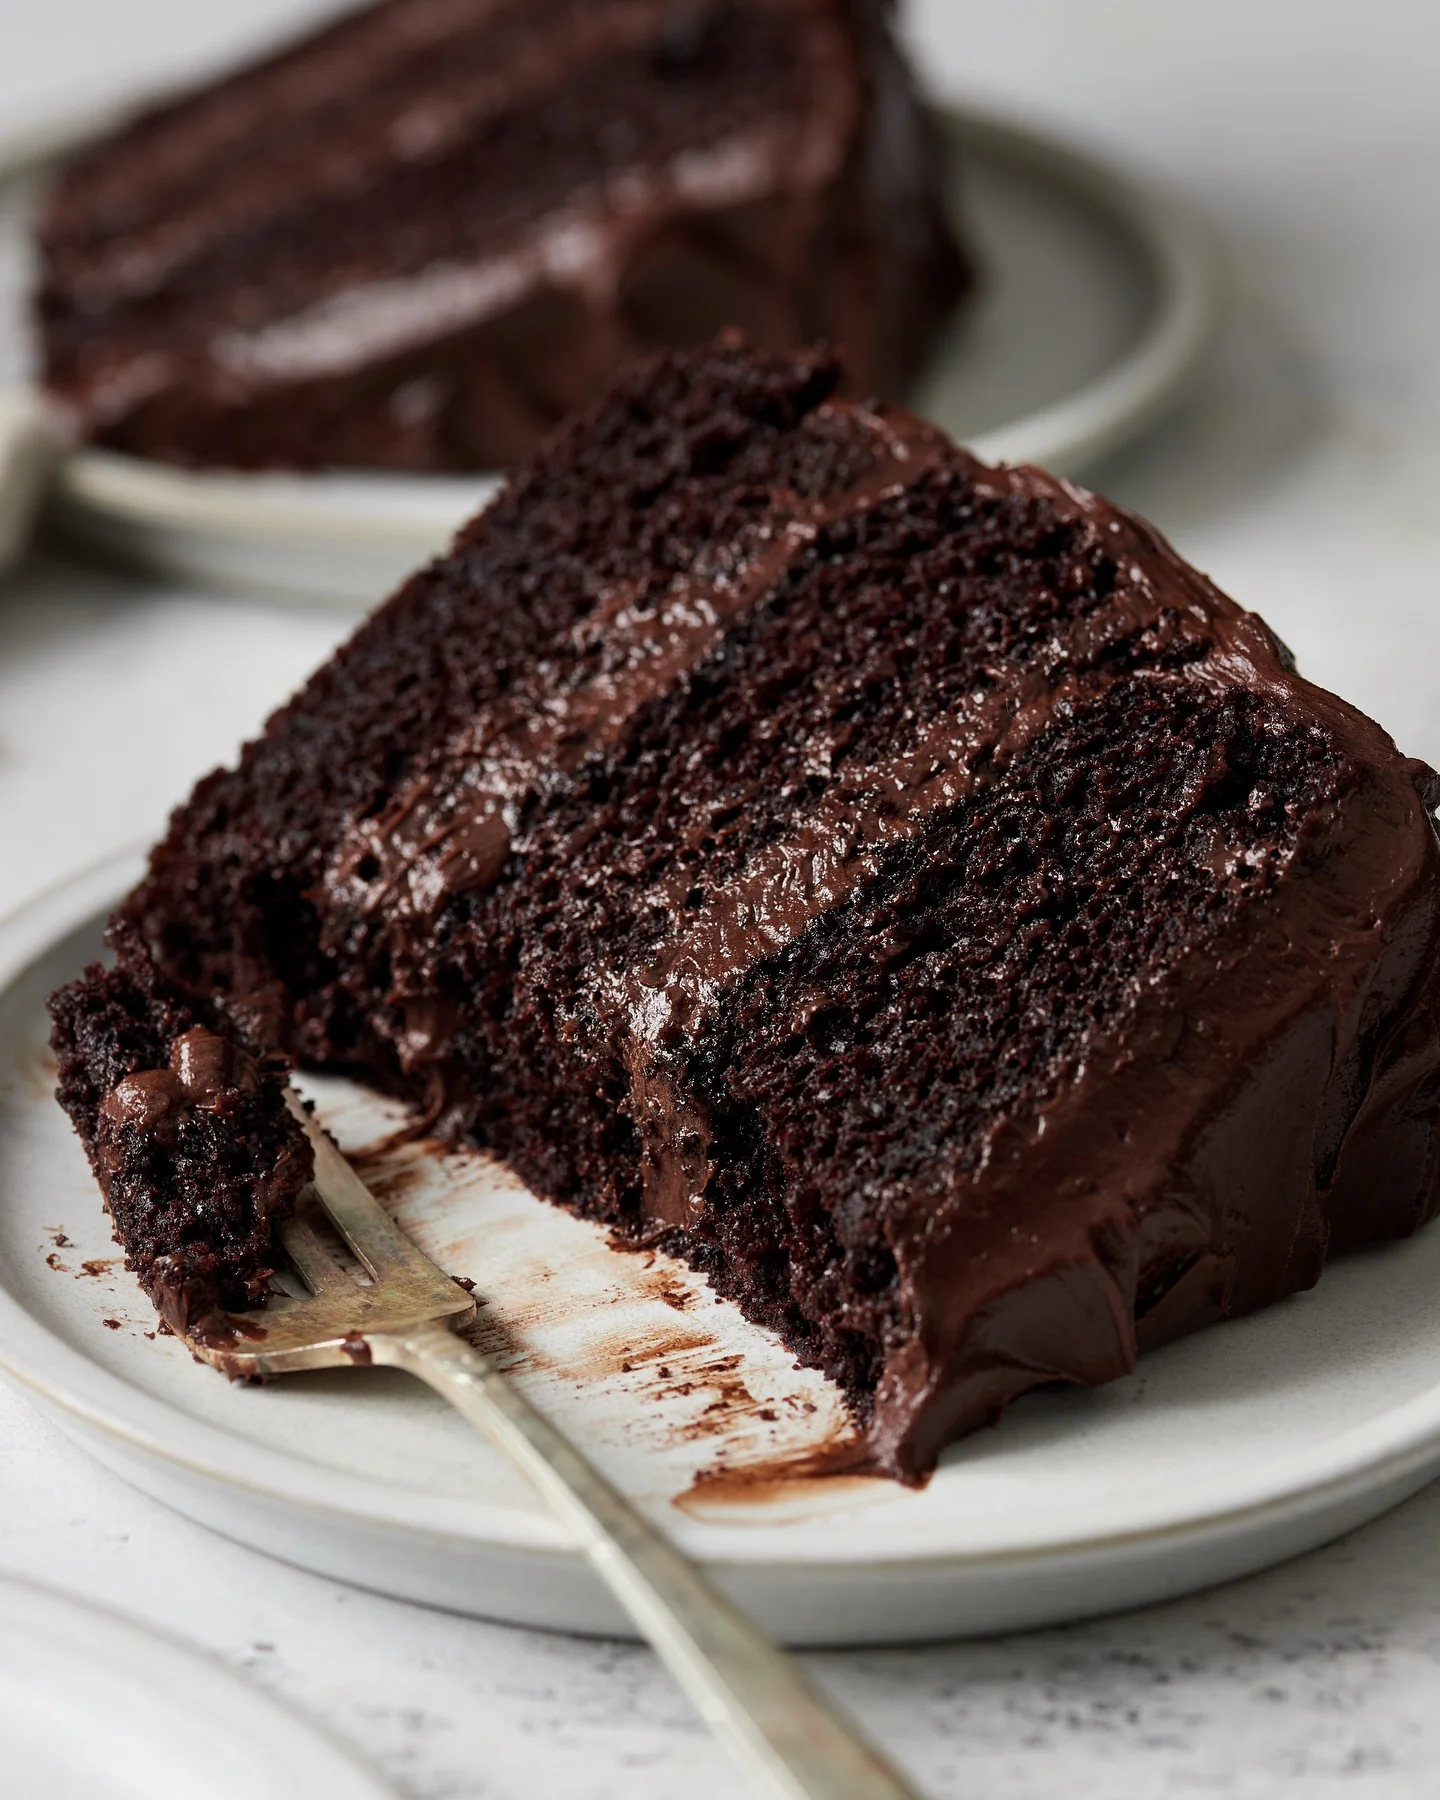
There is a moment in baking a chocolate cake when hot coffee hits cocoa powder and the whole kitchen changes. The powder blooms, the color deepens to near-black, and the batter suddenly smells like a bakery case. That single step is the quiet secret behind this cake, and it is why the crumb stays moist for days instead of drying out by the second afternoon.
This is not a light, airy chocolate sponge. The texture sits in the space between a classic layer cake and a fudgy brownie: dense, dark, and deeply chocolatey in every bite. It holds its shape under a thick layer of frosting, yet it still feels tender on the fork.
You can dress it up or keep it simple. Stack it three layers high with buttercream for a birthday centerpiece, or pour the same batter into a single pan when all you want is a slice of good chocolate cake on a Tuesday night. Either way, the method stays the same.
What follows is a tested, professional approach: real ratios, real timing, and the small technical details that separate a good chocolate cake from a forgettable one. No shortcuts that compromise flavor, no vague instructions. Just a cake worth making again.
Ingredients You’ll Need
Great chocolate cake is rarely about rare ingredients — it’s about ratio, timing, and knowing why coffee, buttermilk, and oil each earn their place in this batter.
One of the things I love about this recipe is that it uses simple pantry ingredients. You probably already have most of them in your kitchen.
Base Ingredients
- 2 cups all-purpose flour
- 2 cups granulated sugar
- 3/4 cup unsweetened cocoa powder
- 2 teaspoons baking soda
- 1 teaspoon baking powder
- 1 teaspoon fine sea salt
- 2 large eggs, room temperature
- 1 cup buttermilk, room temperature
- 1/2 cup vegetable oil
- 2 teaspoons vanilla extract
- 1 cup hot brewed coffee
Optional Add-ins
- 1/2 cup semi-sweet chocolate chips
- 1 teaspoon espresso powder
- 1/4 teaspoon cinnamon
- 1/2 cup sour cream (for extra density)
- 1 tablespoon orange zest
Step-by-Step Instructions
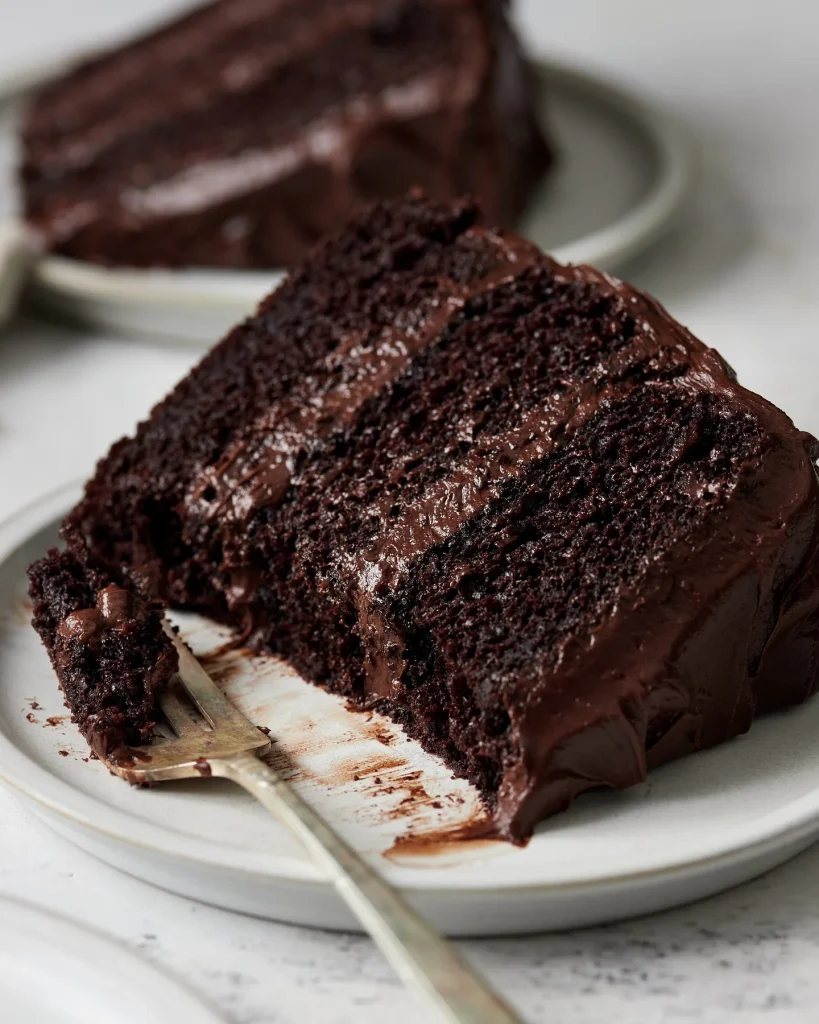
Prepare the Pans and Oven
Preheat your oven to 350°F (175°C). Grease two 9-inch round cake pans thoroughly, then line the bottoms with parchment paper circles. Dust the greased sides lightly with cocoa powder instead of flour so you avoid the pale, chalky coating that flour leaves on dark cakes. Set the pans aside on a level surface. This small prep step matters more than it seems, since a well-lined pan is what allows this dense, moist batter to release cleanly once baked, without tearing or sticking to the edges.
Mix the Dry Ingredients
In a large mixing bowl, whisk together the flour, sugar, cocoa powder, baking soda, baking powder, and salt. Whisking thoroughly here, rather than simply stirring, breaks up any cocoa clumps and distributes the leavening evenly throughout the mixture. This prevents pockets of bitterness or uneven rise later in the bake. Take an extra thirty seconds on this step. It costs nothing, yet it is one of the most overlooked reasons home-baked chocolate cakes sometimes rise unevenly or taste inconsistent from slice to slice.
Combine the Wet Ingredients
In a separate bowl, whisk the eggs until slightly frothy, then add the buttermilk, oil, and vanilla extract. Whisk until fully combined and smooth. Room-temperature eggs and buttermilk emulsify far more evenly than cold ones, which helps the batter stay silky rather than curdled. Pour this wet mixture into the bowl of dry ingredients and mix on low speed, or by hand, just until no streaks of flour remain. Overmixing at this stage builds gluten you don’t want in a tender cake.
Add the Hot Coffee
Slowly pour the hot coffee into the batter while stirring gently and continuously. The batter will thin out noticeably and look almost like chocolate milk — this is exactly right. The heat blooms the cocoa, intensifying its flavor and unlocking a deeper chocolate taste than cocoa mixed with cold liquid ever achieves. Don’t panic at the thin consistency; it bakes into a dense, moist crumb. Divide the batter evenly between your two prepared pans using a kitchen scale for accuracy if you have one.
Bake and Cool the Layers
Bake for 30 to 35 minutes, rotating the pans halfway through for even heat exposure. The cakes are done when a toothpick inserted in the center comes out with a few moist crumbs, not wet batter. Cool the layers in their pans for 10 minutes, then invert onto a wire rack to cool completely. Do not frost warm cake, as the frosting will slide and melt. Patience at this stage protects everything you’ve built so far.
Cook Time
Total
55 minutes
Prep
20 minutes
Bake
35 minutes
Servings
Makes approximately 12 generous servings from a two-layer, 9-inch round cake. That yield assumes standard slices cut for a dinner table or casual celebration, not oversized bakery-style wedges.
If you’re serving this at a larger gathering, the same batter works well baked into a 9×13-inch sheet pan, which slices into 16 to 20 smaller squares. This is a practical option for birthday parties, potlucks, or office celebrations where portion control matters more than presentation height.
For a more dramatic centerpiece, split each layer horizontally to create a four-layer cake. This reduces the yield slightly in terms of large slices but adds visual impact for special occasions like anniversaries or milestone birthdays.
Common Mistakes in This Recipe
The most frequent misstep is overbaking, since chocolate batter looks deceptively dark even when perfectly done, which tricks people into leaving it in the oven longer than necessary and drying out the crumb.
A second common error is using cold eggs, buttermilk, or coffee straight from the fridge, which causes the batter to seize slightly and blend unevenly, leading to a denser, gummier texture than intended in certain sections of the cake.
Many bakers also skip greasing the parchment paper itself, assuming the pan grease is enough, which often results in stubborn sticking around the parchment edges and torn cake bottoms during unmolding.
Lastly, frosting the cake while it is still even slightly warm is a mistake that undoes careful baking, since the frosting melts, slides, and pools instead of setting into clean, structured layers.
Solutions to Common Mistakes
To avoid overbaking, start checking the cakes at the 28-minute mark rather than waiting for the full bake time, and rely on a toothpick test with moist crumbs rather than visual color alone.
Bring your eggs, buttermilk, and any dairy add-ins to true room temperature at least 30 minutes before mixing. This single habit noticeably improves how evenly the batter blends and rises.
Always grease the parchment paper after lining the pan, not just the pan itself, and consider a light dusting of cocoa powder over the grease for a completely clean release every time.
Let the cake layers cool fully, ideally to room temperature, before frosting. If you’re short on time, a brief chill in the refrigerator speeds this up safely without drying the crumb.
Nutritional Information (approx. per serving)
- Calories: 340
- Total Fat: 15g
- Saturated Fat: 3g
- Carbohydrates: 48g
- Sugar: 30g
- Protein: 5g
- Sodium: 320mg
- Fiber: 2g
Cocoa powder itself carries modest amounts of iron and antioxidant compounds called flavanols, which is a small but genuine upside to a dessert built around it. This doesn’t make chocolate cake a health food, but it does mean the chocolate isn’t purely empty indulgence.
Using buttermilk instead of plain milk adds a touch of protein and calcium while also contributing to the cake’s tender texture, so the ingredient is doing double duty for flavor and nutrition alike.
Portion control matters here more than ingredient swaps. A single reasonably sized slice fits comfortably into most balanced eating patterns as an occasional treat rather than a daily habit.
If you’re mindful of sugar intake, this cake pairs well with unsweetened whipped cream or fresh berries on the side, which can round out a serving without needing to alter the base recipe itself.
Storage Instructions
Store leftover cake, whether frosted or unfrosted, in an airtight container at room temperature for up to two days. The coffee-bloomed cocoa keeps the crumb moist even without refrigeration during this window.
For longer storage, refrigerate the cake in an airtight container for up to five days. Bring slices to room temperature before serving, since cold chocolate cake tastes noticeably flatter and denser than it should.
Unfrosted cake layers freeze exceptionally well. Wrap each cooled layer tightly in plastic wrap, then foil, and freeze for up to three months. Thaw overnight in the refrigerator before frosting.
Frosted slices can also be frozen individually on a tray until firm, then wrapped and stored in a freezer bag. This makes portioned, ready-to-thaw servings for whenever a chocolate craving arrives unannounced.
Suggestions
Pair this cake with a simple espresso buttercream or a glossy dark chocolate ganache if you want the coffee note from the batter to carry through into the finished dessert.
For a lighter alternative to heavy frosting, a dusting of powdered sugar or a thin chocolate glaze lets the dense, fudgy crumb remain the star without adding excessive sweetness on top.
Fresh raspberries or cherries make an excellent contrast against the deep chocolate flavor, cutting through the richness with a bright, slightly tart edge that balances each bite.
If serving warm, a scoop of vanilla ice cream alongside a slice turns this into an easy, restaurant-style dessert with almost no additional effort required.
Seasonal Relevance
This chocolate cake works year-round, but it earns a particular spotlight during colder months, when its dense, warming richness feels especially satisfying after a simple weeknight dinner.
It also shines as a birthday cake in any season, since the recipe scales cleanly into layers, sheet pans, or cupcakes without losing the moist, fudgy texture that makes it memorable.
During the winter holidays, dressing the cake with a peppermint buttercream or a dusting of crushed candy canes turns this everyday recipe into a festive centerpiece with minimal extra work.
In warmer months, pairing slices with fresh summer berries or a light whipped cream keeps the dessert feeling appropriate for backyard gatherings rather than overly heavy for the season.
Final Words
This chocolate cake earns its place in a regular baking rotation because it delivers consistent, professional-level results without requiring specialty ingredients or complicated technique. That reliability is worth more than novelty.
The hot coffee trick alone is worth remembering beyond this single recipe, since it applies to nearly any chocolate baked good where a deeper, more intense cocoa flavor is the goal.
Whether you bake it for a birthday, a holiday, or simply because a Tuesday called for something chocolate, this recipe adapts to the occasion without demanding that you change the method.
Keep this one bookmarked. It’s the kind of chocolate cake that becomes a default answer whenever someone asks what to bake for a celebration, and it rarely disappoints.
Frequently Asked Questions
Can I make this cake without coffee if I don’t have any on hand?
Yes. Substitute hot water in equal measure. You’ll lose some of the flavor-deepening effect coffee provides, but the cake will still bake correctly and taste distinctly chocolatey, just slightly less intense and complex.
Why did my cake sink slightly in the middle after baking?
This usually points to underbaking, an oven running cool, or the pan being opened too early during baking. Verify your oven temperature with a separate thermometer and avoid opening the door before the 25-minute mark.
Can I turn this recipe into cupcakes instead of a layered cake?
Absolutely. Divide the batter among lined muffin tins, filling each cup about two-thirds full, and bake at the same temperature for roughly 18 to 20 minutes, checking early with a toothpick test.
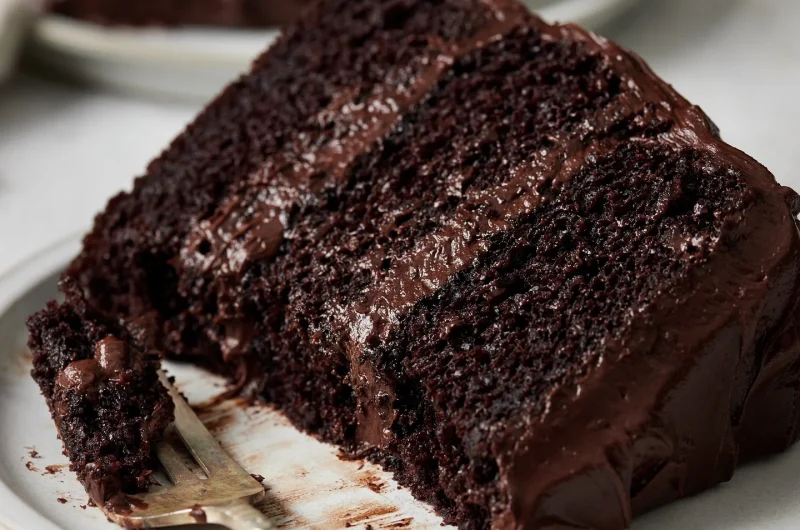
Rich and Moist Chocolate Cake for Any Celebration
12
servings20
minutes35
minutes340
kcalA dense, fudgy chocolate cake made moist with hot coffee-bloomed cocoa. Rich, dark, and tender in every bite, it’s perfect for birthdays or a simple weeknight chocolate craving.
Ingredients
Base Ingredients:
2 cups all-purpose flour
2 cups granulated sugar
3/4 cup unsweetened cocoa powder
2 teaspoons baking soda
1 teaspoon baking powder
1 teaspoon fine sea salt
2 large eggs, room temperature
1 cup buttermilk, room temperature
1/2 cup vegetable oil
2 teaspoons vanilla extract
1 cup hot brewed coffee
Optional Add-ins:
1/2 cup semi-sweet chocolate chips
1 teaspoon espresso powder
1/4 teaspoon cinnamon
1/2 cup sour cream (for extra density)
1 tablespoon orange zest
Directions
- Preheat oven to 350°F (175°C). Grease two 9-inch round pans, line bottoms with parchment, and dust sides with cocoa powder instead of flour.
- Whisk together flour, sugar, cocoa powder, baking soda, baking powder, and salt in a large bowl.
- In a separate bowl, whisk eggs, then add buttermilk, oil, and vanilla extract until smooth.
- Pour wet ingredients into dry ingredients and mix until just combined, avoiding overmixing.
- Slowly stir in hot coffee until the batter thins and turns glossy dark.
- Divide batter evenly between prepared pans.
- Bake for 30–35 minutes, rotating pans halfway through, until a toothpick comes out with a few moist crumbs.
- Cool in pans for 10 minutes, then invert onto a wire rack to cool completely before frosting.
Recipe Video
Notes
- Use room-temperature eggs and buttermilk for smoother batter blending.
- Substitute hot water for coffee if needed, though flavor will be milder.
- Store at room temperature up to 2 days, or refrigerate up to 5 days.
- Unfrosted layers freeze well for up to 3 months.
- Let layers cool completely before frosting to prevent sliding or melting.