A truly great vanilla cake is not about luck. It is about understanding three quiet variables: fat temperature, moisture ratio, and how gently you treat the batter once flour enters the bowl. Get those right, and you land on a crumb that is soft, level, and genuinely tender — not the dry, dense square that vanilla cake so often gets accused of being.
This recipe was built and rebuilt in a home kitchen, not a test lab, which is why it leans on real buttermilk instead of substitutes, room-temperature butter instead of melted shortcuts, and pure vanilla extract instead of imitation flavoring. Each of those choices earns its place in the final texture.
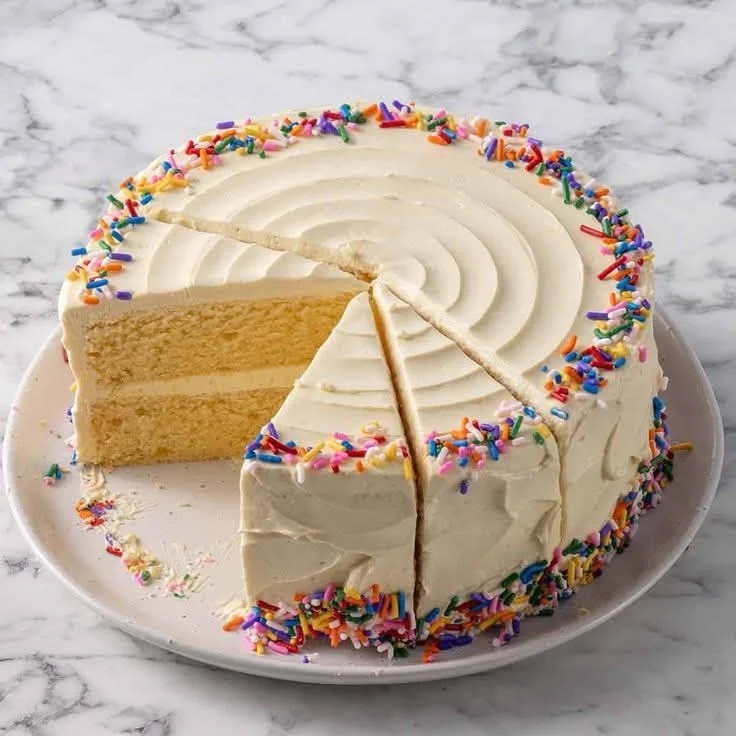
What makes this cake worth bookmarking is the frosting. It is silky, holds its shape at room temperature, and spreads across warm-toned layers without tearing them apart, which is the detail that separates a home bake from a bakery-quality one.
Whether this is destined for a birthday table, a weekend celebration, or simply a craving for something classic and buttery, this is the vanilla cake recipe worth keeping on repeat. Read through once before you start — the technique matters more than the ingredient list here.
Ingredients You’ll Need
Great vanilla cake starts long before the oven — it starts with ingredients that are already sitting in most kitchens, just waiting to be used the right way. One of the things I love about this recipe is that it uses simple pantry ingredients. You probably already have most of them in your kitchen.
Base Ingredients
- 2 ¾ cups all-purpose flour
- 2 ½ teaspoons baking powder
- ½ teaspoon baking soda
- ¾ teaspoon fine salt
- 1 cup unsalted butter, room temperature
- 1 ¾ cups granulated sugar
- 4 large eggs, room temperature
- 1 tablespoon pure vanilla extract
- 1 cup buttermilk, room temperature
- ¼ cup neutral oil (vegetable or canola)
Optional Add-ins
- 1 teaspoon almond extract
- 1 tablespoon vanilla bean paste (for visible flecks)
- ½ cup sour cream (for extra moisture)
- 1 tablespoon lemon zest (for subtle brightness)
- ½ cup white chocolate chips (folded into batter)
Step-by-Step Instructions
Prepare the Pans and Oven
Preheat the oven to 350°F (175°C) and position a rack in the center. Grease two 9-inch round cake pans, line the bottoms with parchment paper, and grease the parchment too. This double layer of protection prevents sticking and tearing when the layers are inverted later. Set the pans aside on a flat surface. Cold pans or an unheated oven are two of the most common reasons cakes bake unevenly, so do not skip preheating time.
Mix the Dry Ingredients
In a medium bowl, whisk together the flour, baking powder, baking soda, and salt until fully combined. Whisking, rather than simply stirring, distributes the leavening agents evenly throughout the flour so the cake rises consistently across the pan. Set this bowl aside. This step takes under a minute but prevents pockets of untouched baking powder, which can cause bitter spots or uneven rise in the finished cake later on.
Cream the Butter and Sugar
In a stand mixer fitted with the paddle attachment, beat the room-temperature butter and sugar together on medium speed for a full 3 to 4 minutes, until pale and fluffy. This is not a step to rush. Proper creaming traps air bubbles that expand in the oven, giving the cake its light, tender structure. The mixture should visibly lighten in color and nearly double in volume before you move forward.
Add Eggs and Vanilla
Add the eggs one at a time, beating well after each addition and scraping down the bowl as needed. Adding eggs gradually keeps the batter from curdling or separating. Once incorporated, mix in the vanilla extract and neutral oil until the batter looks smooth and glossy. The oil works alongside the butter to keep the cake moist for days, not just on the day it is baked.
Alternate Dry Ingredients and Buttermilk
With the mixer on low speed, add the flour mixture in three parts, alternating with the buttermilk in two parts, beginning and ending with flour. Mix just until each addition disappears into the batter. Overmixing at this stage develops gluten, which leads to a dense, rubbery cake rather than a soft one. Stop as soon as no streaks of flour remain visible in the bowl.
Bake the Layers
Divide the batter evenly between the prepared pans and smooth the tops with a spatula. Bake for 28 to 32 minutes, or until a toothpick inserted into the center comes out with just a few moist crumbs attached. Avoid opening the oven door before the 25-minute mark, as the temperature drop can cause the centers to sink. Cool the cakes in their pans for 10 minutes before turning out.
Cool Completely Before Frosting
Transfer the cakes to a wire rack and let them cool completely, at least 1 hour, before frosting. Warm cake will melt the frosting and cause it to slide right off the layers. If time allows, wrap the cooled layers in plastic and chill for 30 minutes; firmer cake is far easier to frost cleanly and stack without crumbs mixing into the buttercream.
Make and Apply the Frosting
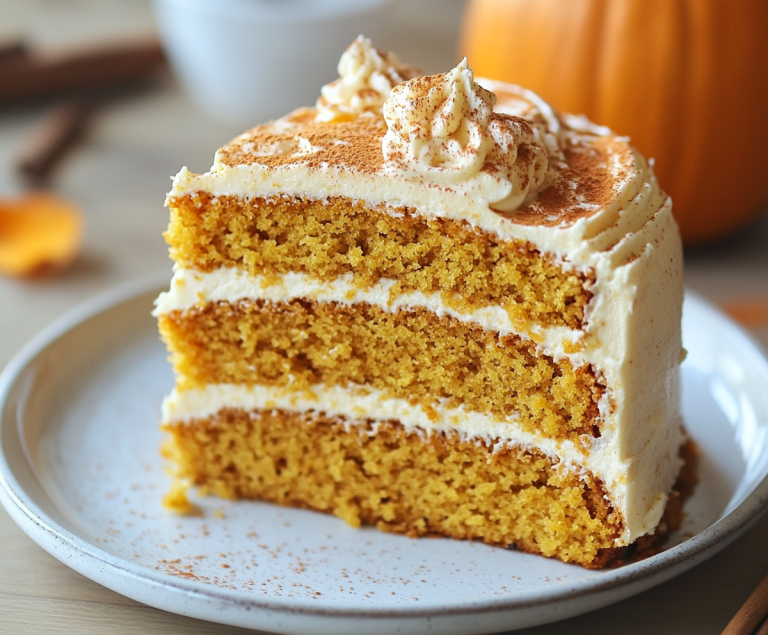
Beat softened butter until creamy, then gradually add powdered sugar, a splash of cream, and vanilla extract, beating on high speed until light and fluffy, about 4 minutes. Spread a generous layer between the cakes, stack them, then coat the top and sides. Use an offset spatula for smooth coverage, or a piping bag for decorative swirls and a more finished, bakery-style appearance.
Cook Time
Total: 1 hour 15 minutes
Prep: 25 minutes
Bake: 30 minutes
Servings
This recipe makes approximately 12 generous slices, making it an ideal size for birthday celebrations, small gatherings, or a weekend treat that still leaves leftovers for the following days. The two 9-inch layers create a cake tall enough to look impressive when sliced, without requiring specialty pans or advanced stacking skills.
If a larger crowd is expected, the recipe doubles cleanly into three 8-inch layers or a half-sheet pan, keeping the same bake time with only a slight adjustment near the end. For smaller households, the cake also freezes beautifully in individual slices.
However it is portioned, this vanilla cake holds its shape and moisture well beyond the first day, which makes serving size flexible rather than a one-time-only decision tied to a single occasion.
Common Mistakes in This Recipe
The most frequent issue bakers run into is using cold butter, eggs, or buttermilk straight from the refrigerator. Cold ingredients do not emulsify properly, which results in a lumpy batter and a denser, less even crumb once baked. Room temperature is not optional here; it is a structural requirement for this particular cake.
Another common mistake is overmixing once the flour is added. It feels productive to keep beating until the batter looks perfectly smooth, but this develops gluten strands that toughen the final texture, turning what should be tender into something closer to bread.
Many bakers also skip measuring flour by weight or the proper spoon-and-level method, instead scooping directly from the bag. This compacts the flour and adds significantly more than the recipe intends, drying out the finished cake.
Finally, frosting a cake that is even slightly warm is a mistake that undoes hours of careful work, causing the buttercream to melt, slide, and pull crumbs into the frosting itself.
Solutions to Common Mistakes
Set butter, eggs, and buttermilk on the counter for 45 to 60 minutes before baking, or briefly warm eggs in a bowl of warm water if time is short. This single habit fixes the majority of texture problems before they start.
To avoid overmixing, switch to hand-folding or the lowest mixer speed once flour enters the batter, stopping the moment no dry streaks remain visible. A few seconds of restraint here preserves the tender crumb this cake is known for.
For accurate flour measurement, spoon the flour into the measuring cup and level it off with a knife, or better yet, weigh it on a kitchen scale for consistent results every single time.
Always cool cake layers fully, and consider a short chill in the refrigerator, before frosting begins. Patience at this stage is what allows clean, professional-looking slices later.
Nutritional Information (approx. per serving)
- Calories: 420
- Total Fat: 20g
- Saturated Fat: 12g
- Carbohydrates: 56g
- Sugars: 38g
- Protein: 5g
- Sodium: 240mg
- Calcium: 6% DV
Beyond indulgence, this cake offers a few practical nutritional notes worth knowing. Buttermilk contributes calcium and a small amount of protein while also keeping the fat content lower than a cake made entirely with heavy cream or sour cream as its main dairy source.
Using real butter rather than shortening means the fat in this recipe comes from a single, recognizable ingredient rather than a processed blend, which many home bakers prefer from an ingredient-quality standpoint.
Portion control naturally happens with a layered cake, since slices tend to be smaller and richer than sheet cake servings, meaning less is needed to feel satisfied after a meal or celebration.
For those managing sugar intake, this cake can be modified with reduced sugar in the frosting specifically, since that component carries a disproportionate share of the total sugar per slice.
Storage Instructions
Store the frosted cake in an airtight container at room temperature for up to 2 days if the kitchen is cool, which keeps the crumb from drying out prematurely while the buttercream stays soft enough to slice cleanly.
For longer storage, refrigerate the cake for up to 5 days, covered tightly to prevent it from absorbing odors from other foods. Bring slices to room temperature for about 20 minutes before serving to restore the frosting’s soft texture.
Unfrosted cake layers freeze exceptionally well. Wrap each cooled layer tightly in plastic wrap, then foil, and freeze for up to 3 months. Thaw overnight in the refrigerator before frosting for best results.
Leftover frosting can also be refrigerated separately in an airtight container for up to a week, then re-whipped briefly with a mixer to restore its light, spreadable texture before using it again.
Suggestions
This vanilla cake pairs beautifully with fresh berries folded between the layers, adding a bright, slightly tart contrast to the rich buttercream without overwhelming the classic vanilla flavor the recipe is built around.
For a more decadent presentation, drizzle a thin layer of salted caramel or fruit compote over each layer before stacking, which adds moisture and a subtle flavor complexity beneath the frosting.
Consider swapping the frosting piping style seasonally — rustic swirls for casual gatherings, or smooth, sharp edges finished with a bench scraper for a more polished, celebratory presentation worthy of special occasions.
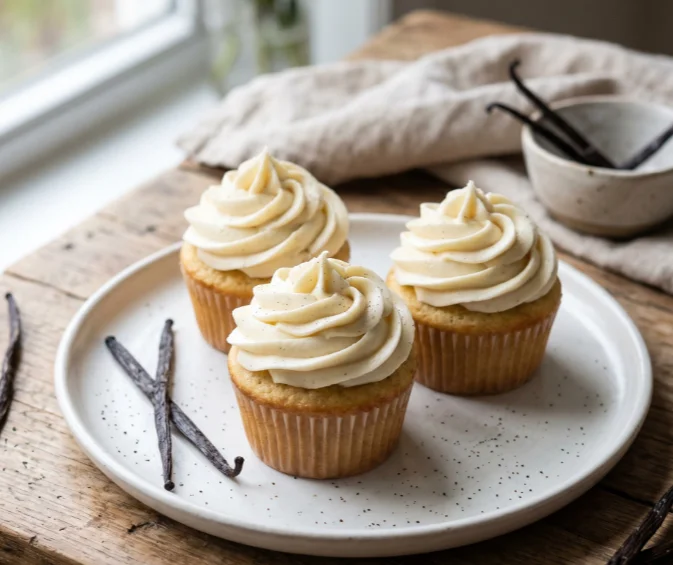
If serving a crowd with varied tastes, this batter also works well as cupcakes, reducing bake time to roughly 18 to 20 minutes while keeping the same soft, moist crumb in a more portable format.
Seasonal Relevance
While vanilla cake works year-round, it shines particularly in spring and summer, when fresh berries, citrus zest, and lighter fillings complement its clean, buttery flavor without competing against heavier seasonal spices.
During colder months, the same base recipe adapts easily by folding in warm spices like cinnamon or nutmeg into the frosting, or serving slices alongside spiced tea, transforming it into a cozier, cold-weather dessert.
Birthdays, of course, remain the most requested occasion for this cake, and its neutral, universally loved flavor makes it a safer choice than more polarizing options like chocolate or fruit-forward cakes for mixed groups.
Holiday tables also benefit from a classic vanilla layer cake, especially when decorated simply with piped rosettes or fresh flowers, letting the cake serve as an elegant centerpiece without requiring elaborate techniques.
Final Words
A good vanilla cake rewards patience far more than it rewards fancy equipment or hard-to-find ingredients. Every step in this recipe, from room-temperature butter to a full cooling period, exists to protect the texture that makes this cake worth repeating.
Once this base recipe is mastered, it becomes a foundation for endless variation, whether that means folding in fruit, swapping extracts, or experimenting with different frosting styles for different occasions throughout the year.
This is the kind of recipe worth saving permanently rather than searching for again next birthday season, since the technique behind it translates to nearly any layer cake attempted afterward.
Bake it once with full attention to the details outlined here, and it becomes clear why simple, classic vanilla cake remains one of the most requested desserts across generations of home baking.
Frequently Asked Questions
Can I make this cake ahead of time for an event?
Yes. Bake the layers up to 3 days ahead and refrigerate them wrapped tightly, or freeze up to 3 months. Frost the day of serving, or up to a day ahead if refrigerated properly beforehand.
Why did my cake dome in the center instead of baking flat?
Domes usually form from oven temperatures running too high or overmixed batter trapping excess air. Use an oven thermometer for accuracy, and level domed layers with a serrated knife before stacking and frosting them.
Can I substitute buttermilk if I don’t have any on hand?
Yes. Mix 1 cup of milk with 1 tablespoon of lemon juice or white vinegar, let it sit for 5 minutes, then use it as a direct one-to-one buttermilk substitute in this recipe.
Moist Vanilla Cake with the Creamiest Homemade Frosting
12
servings25
minutes30
minutes420
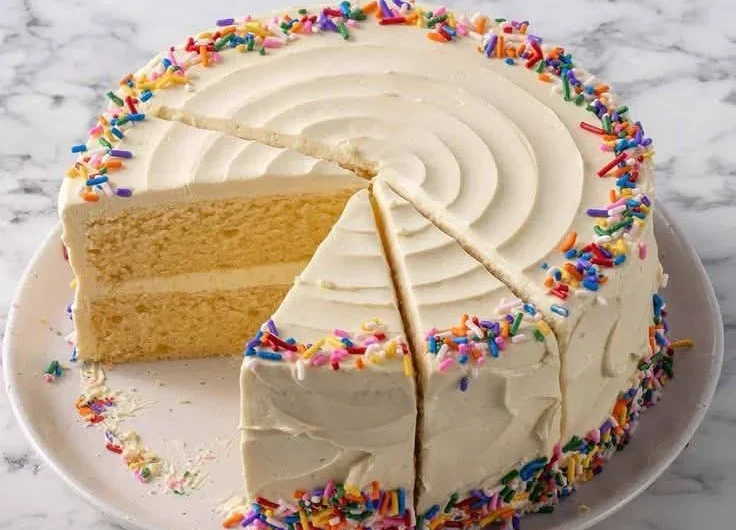
kcalA soft, buttery vanilla cake made with real buttermilk and room-temperature ingredients, topped with silky homemade frosting. Simple technique, rich flavor, and a tender crumb perfect for any celebration.
Ingredients
Base Ingredients:
2 ¾ cups all-purpose flour
2 ½ teaspoons baking powder
½ teaspoon baking soda
¾ teaspoon fine salt
1 cup unsalted butter, room temperature
1 ¾ cups granulated sugar
4 large eggs, room temperature
1 tablespoon pure vanilla extract
1 cup buttermilk, room temperature
¼ cup neutral oil (vegetable or canola)
Optional Add-ins:
1 teaspoon almond extract
1 tablespoon vanilla bean paste
½ cup sour cream
1 tablespoon lemon zest
½ cup white chocolate chips
Directions
- Preheat oven to 350°F (175°C); grease and line two 9-inch round cake pans.
- Whisk flour, baking powder, baking soda, and salt in a bowl; set aside.
- Cream butter and sugar for 3–4 minutes until pale and fluffy.
- Add eggs one at a time, then mix in vanilla and oil.
- Alternate adding flour mixture and buttermilk, mixing just until combined.
- Divide batter between pans and bake 28–32 minutes, until a toothpick comes out clean.
- Cool cakes in pans 10 minutes, then transfer to a wire rack to cool completely.
- Beat butter, powdered sugar, cream, and vanilla until light and fluffy for the frosting.
- Stack and frost the cooled layers using an offset spatula or piping bag.
Recipe Video
Notes
- Use room-temperature butter, eggs, and buttermilk for the smoothest batter.
- Do not overmix once flour is added, to keep the crumb tender.
- Cool cake layers completely before frosting to prevent sliding or melting.
- Store at room temperature up to 2 days, or refrigerate up to 5 days.
- Unfrosted layers freeze well for up to 3 months.